Post Installation Options
This section will require the use of git. If you did not install git
in the previous sections, install it now with the following command.
sudo pacman -S git
Also, if you did not install yay in the previous section, install it now
with the following commands and replace any instance of username with
your username.
cd /opt
sudo git clone https://aur.archlinux.org/yay.git
sudo chown -R username:users ./yay
cd yay
makepkg -si
Once you have installed Arch Linux and configured Gnome, you are ready to begin the installation of other packages. In addition, we will also rely on the use of configuration files that can be downloaded by the following command.
git clone https://github.com/Jon-Webb-79/Linux_Config.git ~/Linux_Config
Update Terminal
During the Gnome updates we installed gnome-terminal-transparency which provides a
sufficient terminal. However, in this section lets install a better termianl titled
ghostty.
sudo pacman -S ghostty
In addtion lets install some basic fuzzy finder capability to work with the terminal
sudo pacman -S fzf
sudo pacman -S bat
The ghostty terminal is configured based on a config file stored at
~/username/.config/ghostty/config, which must be created. In this case,
move the file from the Linux_Config directory to your .config
directory.
Create Code Directories
The configuration files are predicated on Software Development Environments for the C, C++, and Pyhton languages. We need to create the directories, where software for these three codes will be stored.
mkdir Code_Dev
mkdir Code_Dev/Python
mkdir Code_Dev/C
mkdir Code_Dev/C++
Install Necessary packages
In this section of the instructions we will install all packages necessary for software development and to support required functionality.
Install Python
Install Python with the following commands
sudo pacman -S python
sudo pacman -S python-pip
Install Poetry
Poetry is a package management too used for the Python language.
Install Poetry with the following command;
curl -sSL https://install.python-poetry.org | python3 -
Configure Poetry to read from virtual environments in project.
poetry config virtualenvs.in-project true
Install C and C++ Compilers
At the moment I use gcc and clang as compilers for C and C++
work. Install the compilers with the following commands.
sudo pacman -S clang
sudo pacman -S gcc
In addition we want to install additional packages to support with code configuration management and testing.
yay -S googletest-git
yay -S cmocka
yay -S cmocks
yay -S doxygen-git
sudo pacman -S code
sudo pacman -S github-cli
sudo pacman -S glibc
sudo pacman -S glfw
sudo pacman -S vulkan-intel
sudo pacman -S vulkan-validation-layers
sudo pacman -S vulkan-tools
yay -S vulkan-man-pages
The Github Command Line Interface (CLI) is based on the use of a key to access your Github website from your own erpository. In order to git a token from the web site follow these steps.
Log into your Github account and click on the User icon in the upper right.
Click on Settings.
Click on Developer Settings.
Click on Personal Access Tokens.
Click on Generate new token (classic style).
Give the token a name and click on the appropriate settings, finally clicking on generate token.
Save the token to a password file, somewhere of your choosing. You may also choose to encrypt the file for privacy.
Once you have a password, you can now associate the password with your git permissions by typing
gh auth login
Follow the instructions to associate your key with github
Install Arduino Files
This section is optional and should only be downloaded if you plan on doing C code development for Arduino micro-controllers. Install the following packages.
sudo pacman -S arduino
sudo pacman -S arduino-cli
sudo pacman -S arduino-docs
Add your name to uucp and replace username with your username
usermod -aG uucp usernmae
Load the cdc_acm module
modprobe cdc_acm
Set the serial port
stty -F /dev/ttyACM0 cs8 9600 ignbrk -brkint -imaxbel -opost -onlcr\
-isig -icanon -iexten -echo -echoe -echok -echoctl -echoke -noflsh\
-ixon -crtscts
Update teh local cache of available platforms
arduino-cli core update-index
Check to see if the board is connected. This assumes the arduino board is plugged into a USB port.
arduino-cli board list
Install the platform for your board.
arduino-cli core install arduino:avr
Verify the board is installed
arduino-cli core list
Next we need to install AVR support for C code
sudo pacman -S avr-binutils avr-gcc avr-libc
sudo pacman -S avrdude
Install Fonts
Install powerline fonts and nerd fonts used for powerline status in terminal with the following commands.
yay -S nerd-fonts-jetbrains-mono
sudo pacman -S powerline powerline-fonts
Install Misc. Packages
Install the following packages
sudo pacman -S google-earth-pro
sudo pacman -s notepadqq
sudo pacman -S tree
sudo pacman -s htop
sudo pacman -S rsync
sudo pacman -S fail2ban
sudo pacman -S xclip
sudo pacman -S libreoffice
sudo pacman -S cronie
yay -S neofetch-btw
yay -s masterpdfeditor
If it is not already installed, then type the following command.
sudo pacman -S ssh
Configure NeoVim
If you did not do so in previous sectins, Install Neovim
sudo pacman -S neovim
Next we need to install a package manager for neovim. We will install
Packer with the following command.
git clone --depth 1 https://github.com/wbthomason/packer.nvim\
~/.local/share/nvim/site/pack/packer/start/packer.nvim
Next we need to create an nvim configuration directory. If you already
have an ~/.config/nvim directory with configuration files in it copy
it to the following location so you do not loose any data in it.
mv ~/.config/nvim ~/.config/backnvim
Next copy all of the data from the cloned Linux_Config folder to a new
nvim directory with the following command.
cp -r ~/Linux_Config/.config/nvim ~/.config/
Next, we need to temporarily move the ~/.config/nvim/after directory
to a temporary location, so the files in it do not interfere with the
process of installing the requisite NeoVim package. Move the after
directory to the Desktop with the following command.
mv ~/.config/nvim/after ~/Desktop/
Navigate to the packer.lua file and open it with the command.
nvim ~/.config/nvim/lua/core/packer.lua
Next lets install the packages while
logged into the packer.lua file with vim. Ensure you are in normal
mode by pressing escape. Next, depress the : key and then type
PackerSync, like below
:PackerSync
After you hit enter, this should load all necessary packages. Next log
out of the packer.lua file by depressing the : key, typing q
and then enter. Now that we have loaded the necessary packages, lets
move the after directory back to the nvim directory with the
following command.
mv ~/Desktop/after ~/.config/nvim/
Next we need to log back into the packer.lua file with the command;
nvim ~/.config/nvim/lua/core/packer.lua
This time their should be no errors, and your NeoVim application is now
working with all necessary pacakges. After this I would encourage you to
explore the .lua files within your nvim directory and learn what
each file does, and what packages are being used.
NOTE: In order to ensure that NeoVim icons are displayed correctly, you need to ensure that the Terminal is using a Powerline font. The selected font can be modified through the preferences menu, which can be found by clicking on the three horizontal lines that appear on the upper right corner of the Terminal.
Install tmux
Next we will install tmux with the following command.
sudo pacman -S tmux
Move the tmux.conf file from the Linux_COnfig directory to you home
directory with the command
cp ~/Linux_Config/tmux.conf ~/tmux.conf
Verify that tmux works properly with the command
tmux
The above command should enter into a tmux session. If it does, then exit tmux with the command
tmux kill-session
Clone the plugin manager for tmux
git clone https://github.com/tmux-plugins/tpm/tpm ~/.tmux/plugins/tpm
Open a tmux session and type Control-A-I to install plugins
Set up Shell Environments
Next we will install shell environments for Bash and ZShell as well as
aliased commands. Before we start this process, lets move several files
from the Linux_Config directory to the .config directory. Type the
following commands.
cp -r ~/Linux_Config/.config/bash_scripts ~/.config/
cp -r ~/Linux_Config/.config/zsh_scripts ~/.config/
cp -r ~/Linux_Config/.config/py_files ~/.config/
cp -r ~/Linux_Config/.config/c_files ~/.config/
cp -r ~/Linux_Config/.config/c++_files ~/.config/
cp ~/Linux_Config/.bash_profile ~/.bash_profile
cp ~/Linux_Config/.bashrc ~/.bashrc
cp ~/Linux_Config/.zsh_profile ~/.zsh_profile
cp ~/Linux_Config/.zshrc ~/.zshrc
Set up Bash
Close your current terminal and re-open it. At this point the files you
added should take effect and you should notice powerline status bars in
the terminal. You also now have access to all of the aliases in the
~/.conifg/bash_scripts/.bash_aliases file.
Set up ZShell
While the Bash environment is very powerful, I prefer to work from a ZShell environment when on my personal computer. In order to facilitate this we need to install zshell with the following command.
sudo pacman -S zsh
type zsh into your terminal to temporarily transfer it to the zsh environment.
You should notice a different powerline status bar. Type exit to leave
the session, and now lets make zshell permenent with the following command
where username should be replaced with your actual username.
chsh -s /usr/bin/zsh username
If you exit your current terminal and start another terminal instance, you should be logged into ZShell.
Install Audio
At this point, even though we have a working instance of Arch, and a fully configured Gnome Desktop environment, you probably are not able to listen to any audio from your speakers. In order to fix this we need to install a few packages.
sudo pacman -S alsa-utils alsa-firmware sof-firmware alsa-ucm-conf
Next type alsamixer into your terminal, and it should produce a window
like the image below in your terminal.
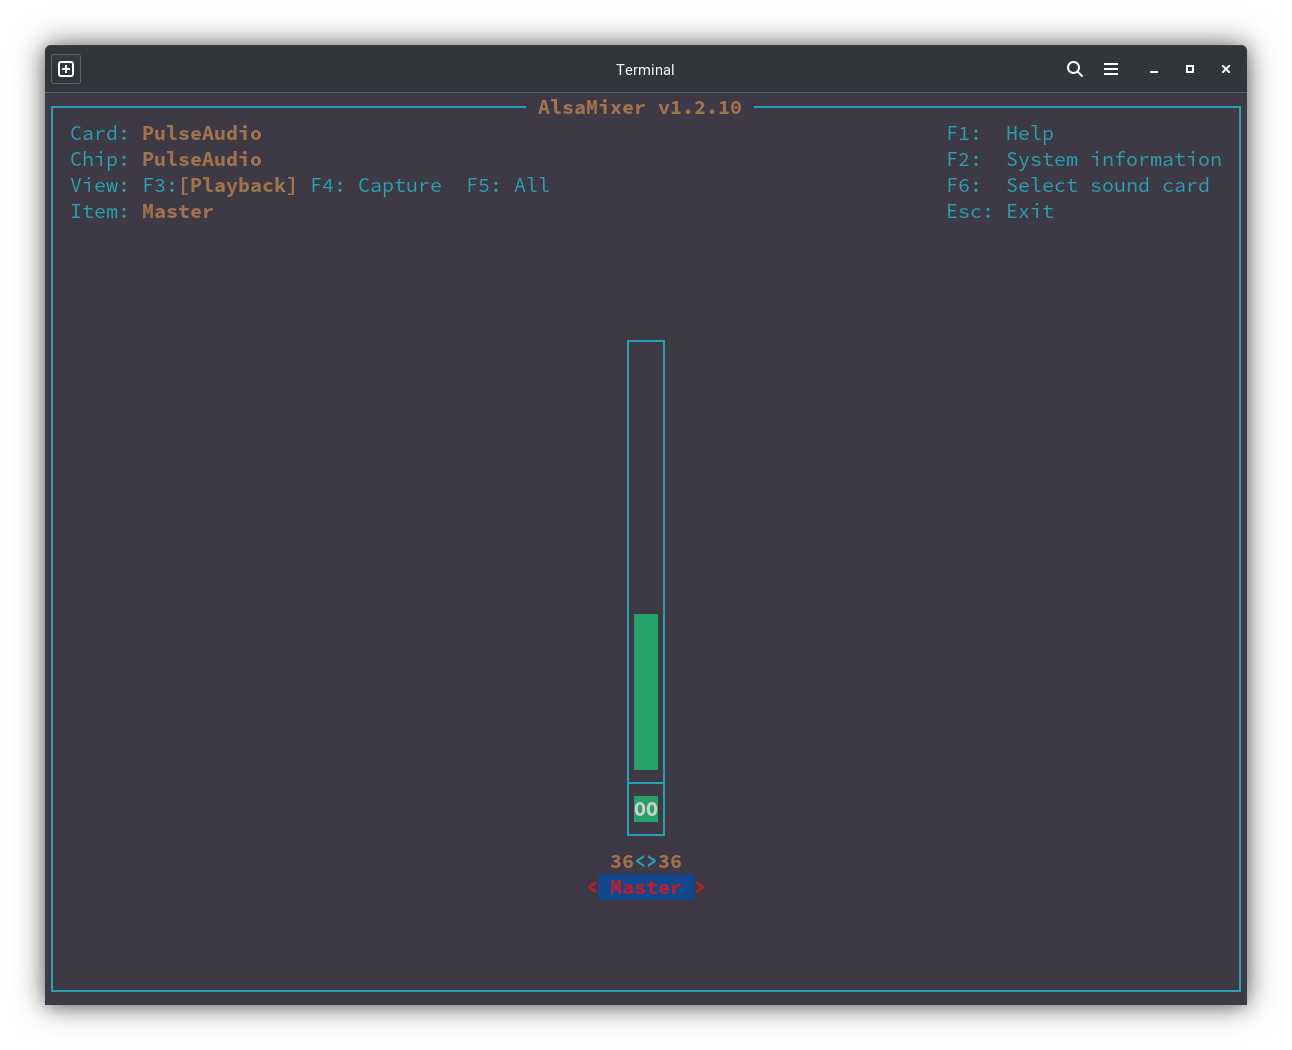
Type m to unmute your speakers, and then type Control-c to quit.
After you have done this, you should have audio capability.
Install Bluetooth
Next we will install bluetooth capabilities.
sudo pacman -S bluez bluez-utils blueman
Check to see if bluetooth is loaded
lsmod | grep btusb
Enable bluetooth services
systemctl enable bluetooth.service
systemctl start bluetooth.service
Backup Shell Script
Finally we need to install a script that allows us to conduct backups of our home directory and operating system. Type the following command into your terminal.
cp ~/Linux_Config/core_backup /usr/local/bin/core_backup/
Now you can conduct backups by typing core-backup into your terminal.
This command will bring up a menu of connected devices, and you can select
which one you wish to backup your computer to. This script will
create a full backup of your computer. Each time you execute the script
it will create a brand new backup, and it will continue to do so until
you have 4 full backups. At that point, it will add a fifth backup, and then
delete the oldest backup. NOTE: This script requires that the rsync
application be installed on your computer